Tuesday, November 3, 2015

[the truth about happiness]

It's been right around 5 months since I last went to work. 

I do other things - photography, card making, scrapbooking, piano lessons, baking etc. - as little side jobs. 

But as of right now, my going to work looks an awful lot like staying home (mostly in my jammies because that whole line about getting dressed makes you feel like being more productive just kind of made me want to punch people in the neck instead of actually be productive) and taking care of my home and my family.

The problem here is that while I absolutely love being home, I can be incredibly lazy.

I can spend a whole day on Pinterest. Or Facebook. Or binge watching Netflix. And, all of a sudden, it's 2:15 and I have yet to shower, or make the bed, or figure out what's for dinner, or clean anything - most days I have forgotten to eat...and I feel horrible at the end of the day. Grumpy. Useless.

I can also be incredibly creative.

Other days I spend all day in my Deb Cave. Crafting. Scrapbooking. Carding. Those days, my creative spirit smiles, and I'm joyful, content, and happy - until I emerge from my cave and find that it's once again 2:15...

I can also be incredibly productive.

There have been weeks where every day, I busted out a serious to do list of cleaning/organizing/purging. But around 2:15, I was still unshowered, unfed, and completely ornery.

And there are days that, for my own healing, are days filled with a whole lot of tears, reflection, reading, sleeping, studying, and prayer. And at 2:15, well, those days look just like the other days.

Luke asked me one day what I do all day on the days that he comes home and he can see my happy and feel the peace in our home. (Now don't get all ticked off at him - he didn't ask me like that!!). He was just curious. I told him I mostly craft, cook, and clean.

And we burst out laughing because, seriously, CLEAN (as a verb!!) made it into my top 3 list of things I do on a good day?! Ha.

The ironic thing about being a homemaker (oh, how I adore that title!) is that the days I enjoy the very most - the days where I am completely at peace and my home feels peaceful and calm and happy - are the days where I combine all of the parts of me.

Today, well, today, I wasn't sure what today would be. I started off the day with the bed made, laundry started, McKayslin off to school, a completed scrapbook page, and breakfast eaten. I stopped by Pinterest for a minute to check out a few pins from last night. And, knowing what would likely happen, I stayed there...

And was sucked into the Little Girl Designs page after clicking through Pinterest about letter writing. There, through a series of other clicks, I found exactly what I needed for today.

She referenced several articles that really caught my attention...

Consume Less. Create More. At first, I thought this was another article on minimalism, which fascinates me, so I clicked over. It's so not. Consuming doesn't have to be stuff - it can be things that take our time - learning is the big one touched on here. 

And this one: The Simple Truth About Happiness
Oh.my.freaking.heck.

“The opposite of happiness isn’t sadness — it’s boredom."
This. So much this.

And so I did something. I took two challenges from Little Girl Designs (#2030create) and (#bringbacksnailmail) - both old challenges, but exactly what I needed today. 

I quickly chose a couple of pieces of paper (which ended up being replaced because they didn't match after I colored the image), a couple of stamp sets, and decided who I needed to write to and got to work. 28 minutes (plus 42 seconds) later, I had a delightful little card made, written in, addressed, and in the mailbox. My heart smiled.


Then I got up out of my chair, left the Deb Cave, and folded the laundry. And put my clean clothes away. And figured out what was going to be for dinner. And wrote this blog post. 

Today, I remember, that my happy is found when I combine all of the parts of me. Today, I will make something else. I will play the piano. I will eat delicious food. I will watch a show. I will clean something. I will shower, actually get dressed (maybe one day I won't want to punch people in the neck when I'm not in my jammies), do my hair, and wear make-up.

Today, I will choose happiness.

Monday, November 2, 2015

[menu plan Monday] OR [sketchy dinners Sunday]

Yesterday, I asked Luke and McKayslin to write down 3 things they would like to eat this week. I wrote down 3 things as well. And as I went to hang the list on the fridge, I had to laugh - there are now 4 menu plan type lists on my fridge. FOUR. Ha.

Going off the list from yesterday, our menu plan (which really should be called a sketch, because there's nothing "planny" about it!!) and weekly schedule look something like this...

Meal Sketches - alfredo, sloppy joes, steak and potatoes, all day steak and cheesy potatoes, pollo con queso (Luke is hereby banned from playing on my Pinterest account!), pancakes (Goosey already volunteered for dinner this night!), Grandma Rainsdon noodles in broth over potatoes, chimichangas, tacos, Grammy mac, chicken parmesan

Schedule -

M: 1 piano lesson (cancelled) so I'll have McKayslin do her lesson today instead. Tonight feels like a good cajun chicken alfredo pasta night.

T: 1 piano lesson, Goosey has rehearsal until 4, I have glee club from 7:30-9 and it's Kenton day. I think Grammy Mac or steak and potatoes.

W: 1 piano lesson. Reflections judging (10-12 or 5-7). Pancakes (we use the same recipe for pancakes and waffles) so McKayslin can cook if I'm gone. Or tacos if that sounds better.

TH: Goosey has rehearsal until 4. Bread day. All day steak and cheesy potatoes. Unless we opted for steak and potatoes on Tuesday, then pollo con queso.

F: Feed the Elders. Friday is always pizza night, so either homemade pizza or pizza sticks I think...

Sa: Clean out both freezers - we need to go pick up our half beef in Lewiston, and our chicken breasts will be here in a couple of weeks also. I'm hoping for Grandma Rainsdon noodles this day.

Su: I teach Sunday School. Grilled or toasted cheese sandwiches. It's tradition.

M: 2 piano lessons. Chicken parmesan or sloppy joes.

Friday, October 2, 2015

[The Quietest Classroom Pencil Sharpener]...and you'll want one for home, too!

I can't even tell you how much I love this pencil sharpener brand! I had them in my classroom (yes, them, plural), and we have a super cute car one that they sent to Kenton when he was in the hospital so he could keep his drawing pencils sharp. We use that one here at home all the time. Fast. Quiet. Easy to use. And always a nice sharp point!


This morning there was a pretty exciting email in my inbox...something new and super fun is coming soon from the makers of The Quietest Classroom Pencil Sharpener! Stay tuned for more sneak peeks and the grand reveal on October 26! You're going to want one of these!!

Friday, August 7, 2015

[MamaGoose_KWJ2]

Just finished up Kayl's July 5th pictures. He takes lots of pictures which makes my job so much easier!  From now on, his letter pages will only be shared with his family, but you can look forward to seeing lots of picture only pages!


For these I created a new kit MamaGoose_KWJ2 based on the color palette of this week's photos. 


It's currently available for free download. But only until the end of August. With soon to be 3 missionary shared folders on my Dropbox, it's getting pretty full pretty fast! At the end of August, all of August's free kits will be removed and replaced with September's kits. That's the plan anyway.

If you pick it up and would like to share your creations, I'd love to see them!


Wednesday, August 5, 2015

[Digital Scrapbooking Kit] FREE!!!

I'm having too dang much fun designing digital scrapbook kits! So far I'm up to 5. 
6 if you count the mini from the blog train...And I started doing this like a week ago. 
Can you say #addictstatus?!

I'm trying to get my cute cousin's mission scrapbook caught up. That boy takes a LOT of pictures. I love it!!! Tonight I was scrapping his pics from July 1 (see, I'm a whole month behind!!!!). Couldn't find anything I liked, so I created stuff. 

Used one of the pictures he sent (July 1 pics were almost ALL scenery pics!) to create the color palette...

And instead of finishing that whole week's worth of pics, I spent 2 hours designing as I scrapped and only finished 1 day of pics. Ha. Oh well. :)
[His letters get their own pages and will be in his completed book, but not shared publicly].


This little kit is called MamaGoose_KWJ1 and I just happen to feel all nice and generous because it's my birthday (and school starts - the first year in my adult life that I'm not teaching!!!) in just 15 days. So...HAPPY BIRTHDAY TO YOU FROM ME! This little guy is a FREE download! I'd love to see what you create with it! You can email me your layouts and I'll come back and add them here on this post!

And I'm rambling because it's wwwwaaaayyyyy past my bedtime! But, hey! I found a great deal on raspberries for Heidi Mom, so we can make jam, so it's totally fine. Right? 

Okay - so here's the preview. It just so happens to be linked to the download. I did mention the download was FREE, right?!


Have fun and thanks for stopping by!

PS: My other kits are on Etsy if you'd like to come on over and take a look!

Monday, August 3, 2015

Best.Pizza.Ever

For a rrreeeallly long time, I was on a search for a homemade pizza dough that I actually liked. I had one that was okay, but it certainly wasn't anything to share on Instagram, and well, those of you that know me well, know that if it's not Instagram worthy, it's just not okay.  ;)

I happened upon this recipe from Lauren's Latest (love her recipes so much!!!) and figured I should give it a try. The first night I made it, Jelly was here and when her parents picked her up, we sent a couple of slices of pizza home with them. They loved it like we did!  They call it "the good pizza crust!" Ha!!! 

The next time I made it, I still really liked it, but something just was off for me. My family certainly didn't complain, but I was bugged. Shocker. I know.

So...over the next couple of months, I adapted, tested, changed the original recipe until it's now our go-to every.Friday.night dinner. Holy Yum. And definitely Instagram worthy!!!


And just because they're super cute, here you get a picture of Grammy and Goosey when I made them make their own pizzas. Really then only had to put the toppings on...they're so picked on.

The changes aren't huge, but here is my version of the Instagram worthy pizza dough...
*If you have a kitchenaide, no adjustments will be required. If you only have a full size Bosch - double the recipe and freeze half in two equal portions - there is not enough dough to use the full size Bosch and have it mix well. I use my Bosch Compact for this and it's absolutely perfect! I actually use my "baby Bosch" for everything except homemade bread or the one recipe of cookies that makes like 6 dozen.*

Best.Pizza.Ever
Adapted from Lauren's Latest by MamaGooseBakery

In the stand of your mixer, put 1 cup warm water, 1 TBSP SAF instant yeast (seriously, just buy the SAF!!), and 1 TBSP white sugar. Mix to combine and let proof until bubbly, foamy, and creamy - about 5 minutes.

Add 1 heaping tsp garlic salt, 2 TBSP olive oil, and 3 cups flour.

Mix until well blended. Set the timer for 6 minutes and let the dough just knead away in your mixer for 6 minutes. I usually set it on speed 2 and kind of just hang out by my baby Bosch so he doesn't jump off the counter (don't ask how I know this is what will happen... :( ).

At the very end of the kneading time, with the mixer still going, drizzle in some olive oil. Not much, just enough to get that glorious little ball of dough and the mixing bowl oiled up so the dough doesn't dry out and stick to the bowl while rising. When the time's up, turn off the mixer, take out the dough hook, and throw a towel over the bowl.  Let rise till double. And hour is about good, but sometimes it only takes like 30 minutes (probably the days that I am a less than perfect measurer of yeast...)

When the dough is doubled, dump it out onto a Silpat liner. Don't have a Silpat liner? Well, then, I'm afraid we can't be friends...get one. The off brand works well also. And I once ordered the most adorable turquoise and red Kudos brand ones that I love. Because they're cute. And of course because they're awesome!!!

Divide that now less than pretty dough into 2 equal sections. You can freeze one (I guess - Lauren said you could - I have a couple in the freezer, but I have this weird aversion to frozen dough and bread items...other than biscuits, wow, but that's a whole other post!). So maybe check out the original post to see her instructions on that part.

Anyway....(not enough grown-up conversation time today I'm afraid, sorry to ramble so)...
Smoosh (technical term right there) one portion of dough out onto whatever it is you want to bake the pizza on. If you're using a pizza stone, just smoosh it on there. If you're using a cast iron pizza skillet (my absolute fave!!!), lightly - VERY VERY LIGHTLY grease with olive oil or butter (don't use margarine. ever. seriously), then smoosh the dough in. The texture is going to feel weird to you if you're used to fluffy bread and roll dough. Trust me, it's fine. Smoosh and stretch and tug and nudge that dough until it fits your pan (we prefer ours pretty thin). Now do the same thing with the other one. I do one on the pizza stone (for breadsticks), and one in the pizza skillet. 


And here's where I have to admit that sometimes we make 4 individual size pizzas instead of one big one. Because Luke and I love this deliciousness that is BBQ Chicken pizza with purple onions and fresh cilantro. And Goosey would rather stab herself in the foot than eat this...

Pizza - smooth on some pizza sauce (the only kind we like is Contadina Pizza Squeeze - I've yet to find a homemade sauce that we love. Then sprinkle on a good portion of shredded mozzarella. Do yourself a favor - buy the real stuff, and shred it yourself. Seriously. Add whatever toppings you want, and sprinkle with a little bit of shredded cheddar (again with the buy the block and shred it yourself!!!). Bake in a pre-heated 450* oven for around 10 minutes. You want the crust to be a deep golden brown so that the bottom crust is baked and not doughy. Sometimes we hit right at 10 - other times it's closer to 15! Let the pizza sit for a few minutes before cutting. You can cut it immediately, but all the stuff will slide off. Consequences.


Breadsticks - mix together 2 TBSP softened salted butter (do NOT use margarine. just don't.) and 2 tsp minced garlic. Or do what we do and mix up that whole stick of butter with 8 tsp minced garlic and just keep it in the fridge. Like a boy scout. Be prepared. Spread the amount you'd like on your dough and top with a generous portion of shredded by you mozzarella and just a bit of shredded by you cheddar. Sprinkle lightly with Italian Seasoning. Bake in a preheated 450* oven about 10 minutes (check at 8 - these guys cook pretty quick). 

And there you have the best.Instagram.worthy.pizza.and.breadsticks.ever. 

Carry on.


Saturday, August 1, 2015

Annika, Warrior Princess

Introducing my newest digital scrapbooking kit:


Sweet Annika just finished her THIRD battle with neuroblastoma. She's three. Such a sweet, spunky little rockstar!  All proceeds from this kit will go to Annika's family.

Kit contains 12 papers, 38 elements, and a layered page template.

Images are linked to Etsy where this kit can be purchased for $5.

Friday, July 31, 2015

[Hoppin' on the Pixel Scrapper Blog Train...]

I've decided I love designing...this is a brand new first attempt. Thanks for stopping by!

Download links will be active only from August 1 - August 31... 

MamaGoose_BugsLife_Papers
MamaGoose_BugsLife_Elements

Kit contains 8 pattern papers, 3 journaling cards, and 12 buggy hashtags.


Saturday, April 25, 2015

[Rain or Shine] Rainbow

I love our Cache Valley thunderstorms!
This adorable kit, Rain or Shine, from Dandelion Dust Designs is PERFECT for all of your rain related pictures...


Saturday, April 18, 2015

[Party Time] Digital Scrapbooking Kit

This might be one of my favorite kits that has ever been created by Dandelion Dust Designs!!!  I love the simpleness of the elements and the colors of the papers.  It's available now at GingerScraps!!


Saturday, April 4, 2015

Thursday, April 2, 2015

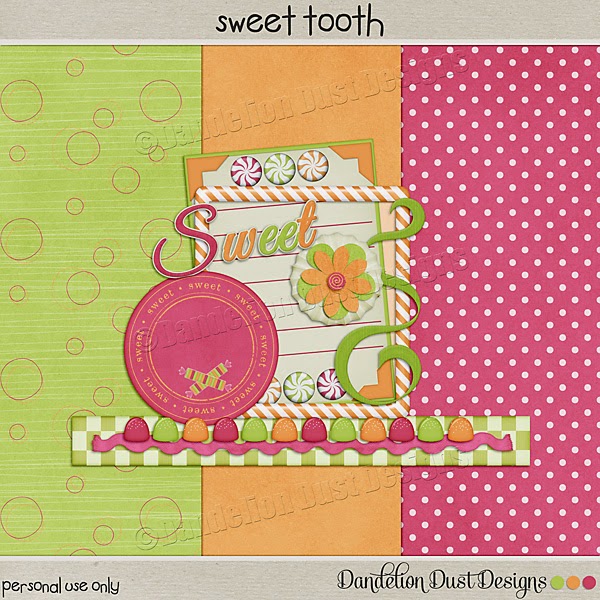
[Sweet Tooth] Digital Scrapbooking

If you haven't signed up for the Dandelion Dust Designs monthly newsletter and you're a digital scrapper - you really should do it now!  This awesome mini kit was this month's FREE NEWSLETTER KIT!!!  Every month Ginger sends out a newsletter, and every month it includes a free mini kit!!!  What are you waiting for?!  Click the images to be taken to the Dandelion Dust Designs site and get signed up!  :)


Saturday, March 28, 2015

[Creative Me]


This is such a fun kit to document all of our crafty adventures!  Hop over to GingerScraps and pick it up for a very limited time - it's only $2!!!  (Images are linked)

Monday, January 12, 2015

[menu plan Monday]

Here's our menu for this week...

Sunday - Grilled Cheese (McKayslin had grilled cheese and an apple.  I had grilled cheese and some smoked salmon.  Luke had grilled turkey and cheese).

Monday - Waffles, Bubba Syrup, Sausage, Eggs

Tuesday - Porcupines, Biscuits, Green Beans

Wednesday - Baked Salmon, Mashed Potatoes, Corn, Scones

Thursday - Homemade Fish and "Chips"

Friday - Spaghetti and Meatballs, homemade French Bread, Corn

Saturday - Hamburger Gravy over Rice, Green Beans, Rolls


Waffles
Whisk together 2 eggs and 1 3/4 cups milk.
Add 2 cups flour, 1/2 cup oil, 1 TBSP brown sugar, 4 tsp baking powder, 1/4 tsp salt.
Beat until smooth.
Cook on a hot waffle iron until steam stops.
Makes 6 large waffles.

Bubba Syrup
In a saucepan combine 1 stick butter, 1 cup sugar, 1/2 cup buttermilk, 1 tsp white corn syrup.  Bring to a boil, stirring frequently.  Stop stirring and boil 1 minute.  Remove from heat.  Stir in 1/2 tsp vanilla and 1/2 tsp baking soda.  Syrup will foam up and get bubbly.

Porcupines
Combine 1 pound ground beef with 1/3 cup uncooked rice, 1/4 cup chopped onion, 1/4 cup water, 1 tsp salt and 1 tsp pepper.  Mix well and form into meatballs.  (This is super easy to double and then freeze the other half of the meatballs at this point).
In a deep skillet with a tight fitting lid, combine 1 can tomato soup, 1/2 tsp chili powder and 1 cup water.  Heat to boiling.  Reduce heat.  Add the meatballs.  Cover and simmer, stirring frequently for about an hour until the rice is tender and the meatballs are cooked through.
If you're using the frozen porcupines, mix the sauce ingredients and put the sauce and frozen meatballs into the crock pot.  Cook on high 2-3 hours or low 4-6 hours, stirring when you get a chance.

Biscuits
Mix together 1 3/4 cups flour, 1 1/2 TBSP sugar, 1/4 tsp salt, 2 tsp baking powder, 1/2 tsp cream of tartar.  Use a pastry blender to cut in 6 TBSP cold butter.  Do NOT overmix.  The butter should be little globs throughout the flour mixture.
Add 1 egg and 1/2 cup milk.  Stir just until combined.
On a well floured surface, knead about 15 turns of the dough, kneading in enough flour for a very soft but non-sticky dough.
Pat dough about an inch to and inch and a half thick.  Cut with a glass or biscuit cutter to make only 8 biscuits.
Bake at 450* until golden brown and the middle is no longer doughy.
Cool about 5 minutes on the baking sheet before serving.

Spaghetti and Meatballs
For the sauce...
In a large pot, saute' 1/2 chopped onion and 2 tsp minced garlic in a little bit of oil until soft and fragrant.
Stir in 28 oz. crushed tomatoes and 16 oz. tomato sauce.
Add 2 tsp dried parsley, 1/2 tsp dried basil, 1/2 - 1 tsp dried oregano (or Italian Seasoning), 2 tsp salt, and 2 TBSP sugar.
Bring to a slow boil, stirring frequently.  Reduce heat to a simmer and let simmer for an hour or more.

For the meatballs...
Combine 1 pound ground beef with 1 TBSP minced dried onion, 1 tsp season salt, 1 tsp black pepper, 1/4 cup oats, 1 egg, and 1/4 cup water.
Mix well.  Form into meatballs.
Bake at 350* until nearly done.
Add to the sauce and simmer together while you cook the noodles.

We like the leftover meatballs and sauce as meatball subs.  Or if there is only leftover sauce and no meatballs, I freeze the leftover sauce to use in tomato macaroni soup.

French Bread
Mix 1 tsp SAF instant yeast with 1 tsp sugar and 1 1/2 cups warm water.  Let proof until bubbly (about 5-10 minutes).
Add 1 1/2 tsp salt and 2 cups flour.  Mix well.
(I use my small Bosch for this - there's not enough dough for the big Bosch, but a Kitchen-Aide would work fine.  You could also do this by hand).
Mix in 2 more cups flour.  Knead about 8 minutes.  The dough will be fairly stiff.
Let rest until doubled (about an hour).
Divide into equal portions (1 big loaf, 2 skinnier baguette type loaves, or our favorite, 8 hoagie size buns).  Shape.  Place on a Silpat lined cookie sheet to rise about 30 minutes.
With a knife, slash each loaf 2 times - carefully and quickly.
Gently brush each loaf with water (use a pastry brush).  This will give the bread that chewy, crispy crust.
Bake at 400* until golden brown and the loaves sound hollow when tapped.  This will take anywhere from 15-25 minutes depending on your oven and the size of your loaves.

We also like to eat this bread hot from the oven dipped into a mixture of 1 stick melted butter, 1 tsp dried parsley, and 2 tsp minced garlic.

Saturday, January 10, 2015

[mental shift] MENU PLANNING


We set this goal as a family to live on one income and save the other.  It can be done.  It will take patience. And a whole lot of planning.  (I so just had a song from Into the Woods running through my head - it takes patience, and fear, and despair to change - though you swear to change, who can tell if you do?). That's kind of where we are...patience, and fear and despair to change...

Yesterday I had this huge mental temper tantrum.  Wah, wah, wah - we can't go out to eat, it's not in the budget.  Wah, wah, wah - I have to cook again tonight, and I'VE COOKED EVERY.SINGLE.NIGHT.THIS.WEEK.ALREADY.AND.IT'S.THE.FIRST.WEEK.BACK.TO.SCHOOL.AFTER.CHRISTMAS.BREAK.  Wah, wah, wah.  I don't have time to cook.  (Wait, what?! - If I have time to go to town, get something to eat, and then come home, I certainly have time to cook dinner).

I'm such a spoiled brat.

I didn't even make the menu plan for this week, McKayslin did!  Yes, I've had to cook.  But she planned it.  And Luke does the dishes.  And miracle of miracles (name that musical!), our kitchen counter has stayed cleared off for 9 entire days.  That has never happened before.

Luke only ate out one lunch this week.  And I didn't eat school lunch at all.  McKayslin ate school lunch twice this week.  Because she wanted to.

That realization brought a slight mental shift.  My stomach hasn't hurt all week.  We've eaten dinner at the table every night (except last night which is always the exception for Friday night pizza and a movie).  We've actually talked to each other instead of playing on our tablets or watching tv.  It's been quite nice.

I knew I needed a better way to menu plan - something that involved the menu plan and the grocery list all on one page.  Something that would leave my menu plan safely at home on my fridge. I'm certain there are at least 121 different things just.exactly.like.this floating around the internet.

My right brained reality would much rather make one than search for one.  

So I made one.

And I posted it on Instagram.
That's when I realized that I wasn't the only one looking for a better way to plan.  My friends were just as excited about this little thing as I am!

I made a few tweaks to the original document.  Things that I had forgotten, or that, when I filled out the form, annoyed me.

What I did love...
• There's a spot to write what I think we need when I'm planning.  And a spot to transfer it to the grocery list when I check if we really do need it or not.

• The grocery part can be cut off the bottom and taken to the store, while the menu plan stays intact, clean, and unwrinkled on my fridge.

• It's cute.  And it starts on Sunday.  We shop on Saturdays.

What I didn't love...
• I needed more space to write the actual menu.


• I was missing a whole lot of categories for the shopping list part.

• The font wasn't my favorite (I know, first world problem!)

So...this morning, I updated. Tweaked. Fixed.  And came up with this.

I haven't tried it out yet.  We'll see if it makes the cut when I menu plan next week.  ;)  This week, I'm sticking with the one I already filled out.  Because I'm lazy.  And it's already done.

Click on the image to download your own copy if you'd like.  Let me know if you find something that doesn't quite work.  I tried to lay out the grocery shopping boxes so they would follow the sections of the store.  But realized they don't follow our grocery store but our Wal-Mart.  I think it will be okay.  

We'll see.

I'll post our actual menu plan and recipes a little later.  I need to go cut the bread for french toast.   

Happy Planning! 

Sunday, January 4, 2015

[gospel principles] lesson 14 ~ Priesthood Organization

I actually really love teaching Gospel Principles.  Even though we're on round 3 of teaching through the manual, with each lesson, I learn something new.  Today our lesson is Priesthood Organization, lesson 14.

This lesson is one that I have struggled to understand and teach well in the past.  For some reason, my brain gets too wrapped up in the logistics of Priesthood VS Keys of the Priesthood.  I'm grateful that Brother Lott and Brother McBride are in Sunday School nearly every Sunday and can redirect and clarify when I get lost.  :)  This is the 2nd time I've taught this exact lesson.  I *think* I have a little better understanding than the last go round.  I guess we'll see.

Another thing that has been challenging for me is class participation.  I'm fully 100% guilty of being that person in class who never says anything, even when the teacher asks, so I totally understand why sometimes I ask a question and hear crickets...

As a teacher by profession, I understand that participation increases understanding.  It's just a lot less work to get 6 and 7 year olds to participate than to get adults to respond.  Somewhere along the way, we gain all of these insecurities and inhibitions.

One thing that has helped me understand each lesson I teach a little better is to sketch, doodle, or simply write out parts of the lesson that are more difficult to understand or the parts that really stuck out to me.  Interestingly enough, the lessons I've taught 3 times now have 3 very distinct and different sketches.  Sometimes the differences are very noticeable to me and pinpoint something with which I was struggling.  Other times the differences are more subtle, yet as the lesson is given, a comment is made by a class member allowing me a glimpse of a question they had, directly correlating to the difference in the delivery of that lesson.  And sometimes, all of my sketching, planning, drawing gets thrown completely out in the midst of delivering the lesson.

How grateful I am for the counsel and direction of my Heavenly Father through the Holy Ghost as I prepare and teach each lesson.  Each lesson I teach is an opportunity for me to study, pray, and catch another glimpse of how much our Father in Heaven loves us.

Wow, that was a fun little tangent...  I ramble.  I know.

What I'm getting at is this little handout I made to go with today's lesson.  We're studying the Organization of the Priesthood.  I've included some quotes from the lesson that were ones I've highlighted in several colors in my manual (I use a different color each time I prepare a lesson - helps me see the differences).  And there are spaces to discuss and discover the duties of each office in the Priesthood, as well as a brief moment of reminder - Priesthood/Keys of the Priesthood.

You're welcome to use this printable for teaching your own Sunday School lesson, Family Home Evening, or personal study.  The image is linked.  Just click on it and it will take you to dropbox where you can download or print.  If the link doesn't work, please leave me a comment to let me know.  It's been a long time since I've done anything like this.

If you have questions about what our family believes, let me know.  I have some friends I can send your way.  :)

Saturday, January 3, 2015

Well, hi there!

Welcome to MamaGoose Craft and Bakery (and whatever other things we decide to dabble in)...

Here you'll find recipes, crafts (mostly handmade cards and digital scrapbook layouts), printables for home and church, and a little bit of everything.